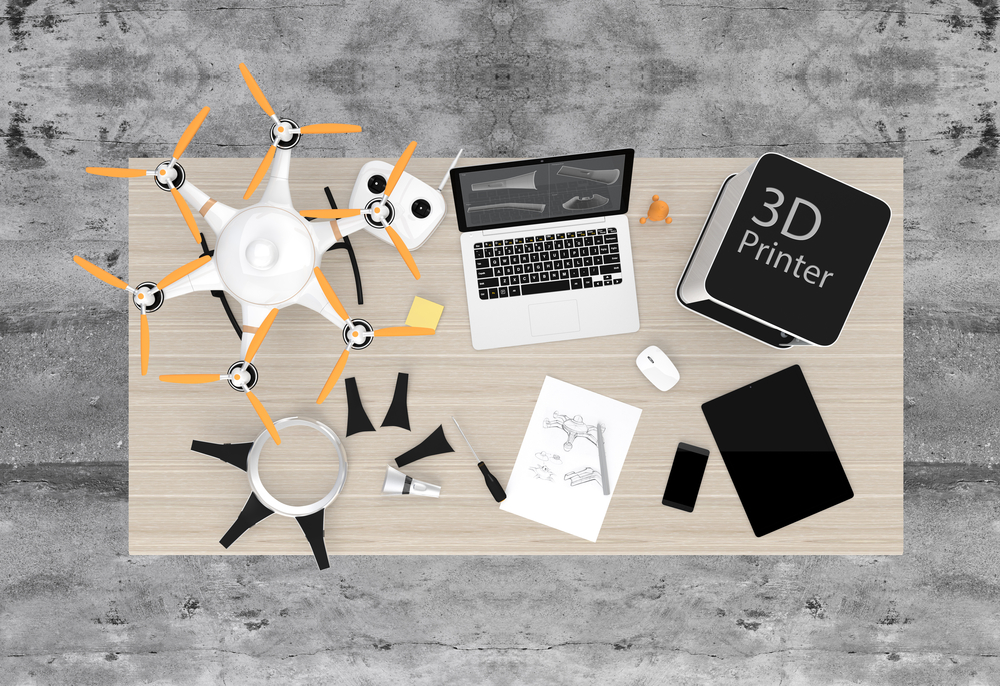
Unmanned Aerial Vehicles (UAV) have been there for decades but after the introduction of small drones, their popularity has seen a massive surge due to the endless potential that it offers. The FPV (first person view) technology together with the rapid developments being made in GPS system has opened up a whole new possibility for the development of drones.
They are not the only RC flying devices available in the market today but their capability of taking images and recording videos has certainly gone down well with people. There are many varieties of drones that may be available easily. They can come in many different colors, sizes and features.
On the other hand, there are also many types of DIY drone kits available for people who may like to assemble it themselves. However, the real challenge can be to make a drone from the scratch. A person may have to visualize the parts and take steps accordingly. We list here step-by-step instructions that can be useful for making a drone.
All the Needed Parts
 There are some components that are indispensable for making a working drone and these must be procured. We list them out here in the correct order.
- Frame– It is very important to select a sturdy frame for a drone. There may be two options for procuring it. Either, get it purchased or make it as per your preference. If it is to be bought, then there are many online stores available that sell high-quality frames for the purpose. Alternately, for making a frame, some engineering knowledge may be required related to material strength.
A light metal, wood slat or plastic can be chosen for making the frame. If wood is chosen, then a wood board of at least 2.5 cm thickness may be needed.
- Motors– They are the heart of any drone kit. Usually 4 motors may be needed for a normal drone but if an octocopter is being made, then 8 motors may be needed. For making a drone, a brushless motor is preferable so that it can be helpful for the battery to support it for a longer duration in flight. Unless there is a very good understanding regarding motors, it is always advisable to buy them from a store.
- Electronic Speed Control (ESC)– This component is responsible for providing the needed power required by the motors. Depending upon the number of arms in a drone, these can also be selected likewise in the same number.
- Propellers– While selecting propellers, it should be ensured that they complement the material of the frame. There may not be wooden propellers but a nice fit should be chosen.
- Connectors– 4.5 mm connectors will be needed for the power distribution board and 3.5 mm connectors for welding the ESCs and motors.
- Power Distribution Board– It connects the battery with the ESC.
- Batteries – Before selecting a battery, one may need to consider its capacity and type that can help it in being in the air for long. Most drones use Li-Po batteries these days and it has definitely become the chosen choice of most DIY drone.
- Battery Monitor– It is not a compulsory item but then, having a monitor can be useful to stay aware of the remaining charge left in the battery. For example, if the drone is hovering over a water body, there won’t be any risk of it falling inside as the remaining charge can be seen and action taken accordingly.
- Mounting Pad– These pads can help in dampening any vibration and hence, make a better flight. For applications where pictures or videos may be required by a drone, having these pads can be useful.
- Controller– Command to the motor is given by it and it also helps in sharing of power.
- RC Receiver– The receiver can be mounted on the drone and the transmitter can stay with the user for effectively guiding it.
- Camera – A camera may be needed if someone wants to capture the surrounding snaps or make a video. These days there is much demand for high resolution pictures and therefore a 4k camera can be chosen. Additionally, a gimbal may also be needed with a camera.
- USB key– It is required for saving videos and photos.
All these are the elementary components that may be needed for making a working drone that can fly satisfactorily. Apart from these mentioned components, one may also require AWG silicone wires, Servo lead wire cables, 3M command strips, battery charger, zip ties, thread locking compound, etc. In addition to all of these, there are certain other things that can also be used for making a drone.
Steps Involved in Making a Quadcopter
 After getting all the components mentioned above, they have to be assembled properly for making a working drone. The simplest and most efficient drone that can be made is the quadcopter. Hence, we detail the making process over here.
Step 1: Building the Frame
For anyone who wants to know ‘how to build a drone?’ one of the the main aspects is always the frame because that is where the maximum strength is needed as it is responsible for supporting the complete structure. Therefore, a frame should be selected carefully. Metal, wood or plastic can easily be chosen for making the frame.
If wood is selected, then one has to find a wood board that is 25-30 mm thick and at least 60 cm long so that two laths can be cut from it that are 60 cm in length and 30 mm in width. These two laths can be used to make the ‘X’ structure by crossing them. Within the central part of the frame, a rectangular piece is needed and so, a wooden sheet may be required. It should be 2 mm thick and the needed size may be 6X15 cm.
Other dimensions can also be used but the mentioned one can be most desirable. Nails and glue may also be required for connecting the laths. In case if plastic or metal is used, the dimension can still be the same but there can be a difference in how the laths are connected. Some of the best premade frames are listed here.
- LHI 220-RX FPV Quadcopter Frame (Carbon Fiber)
- iFlight XL5 Carbon Fiber Frame
- Usmile X style Carbon Fiber Drone Frame
- Readytosky FPV Drone Frame (Carbon Fiber)
- RipaFire F450 4-Axis Flame Airframe
- Readytosky S500 Quadcopter Frame with Carbon Fiber Landing Gear
Step 2: Selecting Motors, Propellers and Electronic Speed Controllers
 Motors, propellers and ESCs are the most important components of a drone and therefore sufficient care should be taken while selecting them. They should be purchased only from an authorized shop and their size must be according to the drone’s dimension.
For getting an efficient motor (rotor), it can be a good piece of information to know that multi-rotor drones can promise stable flight and produce more speed as every rotor may work with the other’s pressure points. Some of the best rotors are
- Emax RS2205 2600KV Brushless Motors
- HOBBYMATE Quadcopter Motors Combo
- Gemfan GT22015 2650KV Brushless Motors
- DLFPV DL2205 2300KV Brushless Motors
Metal 9-inch props can be one of the best propellers for drones as these can be durable and may not bend easily if it accidentally hits any obstruction. However, performance-wise, carbon props can be better. Some of the best propellers are as follows.
- BTG Quick Release Carbon Fiber Reinforced Propellers
- Performance 1245Black Propellers MR Series
- Yoo Tek 4 Pairs Foldable Quick Release Propellers
- Myshine 9450 Self-tightening Propeller Props
- Jrelecs 2 Pairs Carbon Fiber Propellers
For selecting an ESC, people who do not want 4 of them can easily get a 4 in 1 controller. Some of the best models are listed below.
- 35A ESC BlHeli32 32bit DSHOT1200
- Thriverline Sunrise ESC 20A BLHeli-S
Step 3: Assembling of Motors
In DIY drones, placing the motors correctly on the frame is very important and therefore holes must be drilled at proper points on the frame as per the motor’s screw hole distance. If there is a mounting with the motor available, then there may not be a need to drill another hole for the shaft and the clip to move freely. Fix the motor at the proper place on the frame using screws and screwdriver.
Step 4: Place the Electronic Speed Controllers correctly
 After assembling the motors, it is important to connect the speed controllers and these should be connected at the bottom of the drone due to various reasons.
Out of all the other reasons, it can be helpful in “unloading” the top part of the drone where different components would be added. For getting firm grip on the controllers, zip ties should be used for the purpose. In this way, the ESCs can stay sufficiently secured when in flight.
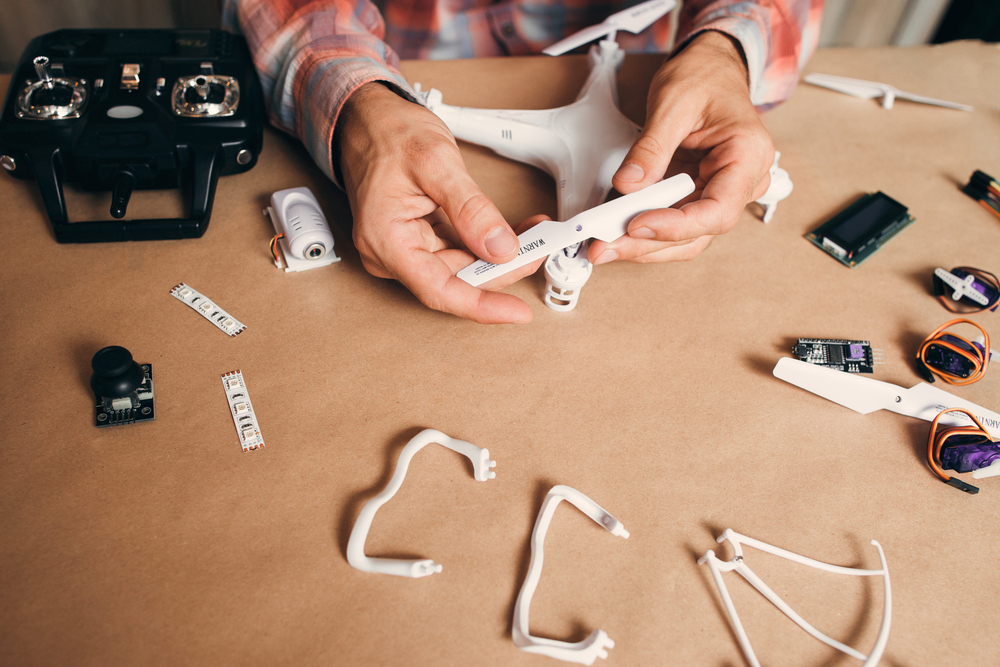
Step 5: Prepare the Landing Gear
A shock absorbent landing gear is highly desired for any drone because it can help in absorbing the mechanical shocks while the drone makes a landing. There can be many ways of making it but one of them have been mentioned here.
Get a metal pipe of about 6 inches diameter and cut 4 rings out of it with a thickness of 1-2 cm. The size of the rings should be as per the dimension of the drone. Use duct tape to fix them with the frame. However, if metal pipe is not desired, any other material that is flexible and strong may also be used in its place.
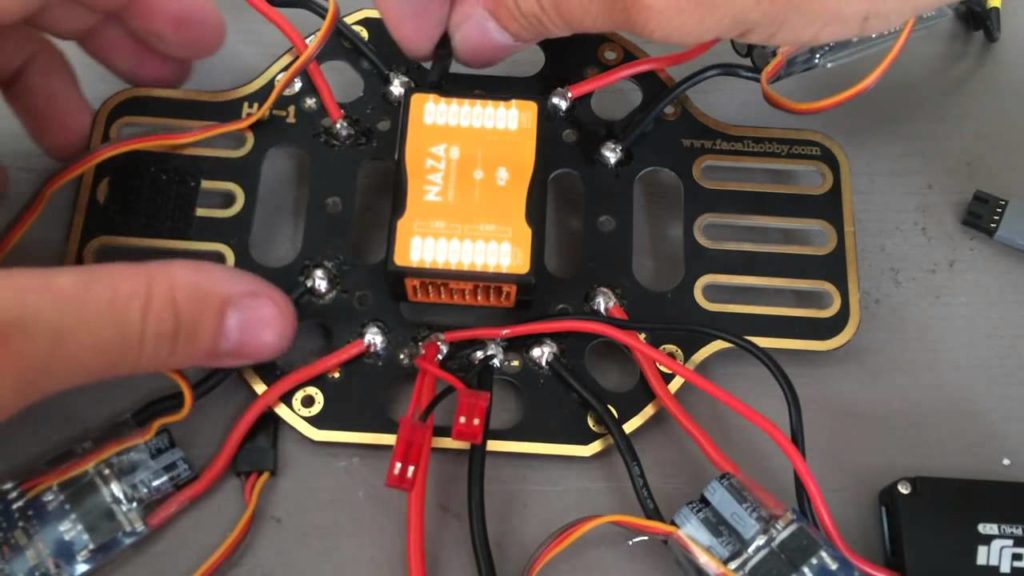
Step 6: Flight Controller
A flight controller is an important part of the drone kit and it must be there so that all changes and shifts in wind and direction can be affected. It can also allow the drone to be stable in air. There are two available options for getting it. First, one can easily purchase a readymade controller. The other option is to make it. Making a controller may not be very easy and can require sufficient efforts. Therefore, buying them readily can be more suitable. Some of the best available controllers are detailed below.
- DJI NAZA-DJI Naza Lite or DJI NAZA M V2 closed sources
- OpenPilot CC3D-It is an open-source flight project and has 6 channels with the MPU6000. There is a wizard guide available with it that can help a user through the setup and installation. It is readily available through many channels on the internet.
- KK2-It is one of the cheapest controller and hence it is a highly-used project. It does not need a computer as it has an LCD based on sophisticated AVR controllers. It has MPU6050 sensor that can help in writing the firmware. However, it needs manual tuning and that is why it may not be very easy for RC beginners.
- ArduPilot-It has automated flight modes in it and its performance can be one of the best amongst all controllers although the price may be slightly on the higher side.
- NAZE32-The setup of this controller can be somewhat complicated but it can be quite flexible to use. There are advanced fliers in it that can substantially help in improving the flight control over a drone.
Step 7: Selecting the Correct RC Tx-Rx (Wireless Remote Control System)
 A remote control system is needed to control any DIY drone. Apart from this system, some other channels like yaw, throttle, roll, pitch and few other channels for camera controls may also be required. Some of the best RC control systems for selection are as follows.
- Spektrum DX8 Radio Transmitter
- YKS FlySky FS-i6 2.4GHz 6 Channels Radio Control System
- Futaba 10JH 10-Channel Heli T-FHSS Computer Radio System
- Turnigy 9xr PRO Radio Control System
Step 8: Putting on the Flight Controller
After selecting a desired Flight Controller, it has to be properly mounted on the DIY drone. It can be placed in a particular direction on the top but all components should be connected properly before calibrating it. Zip ties can be used for correctly connecting all other components tightly. Below the flight controller, a small part of sponge can be placed so that motor vibrations can be negated and considerably reduced. This way, the drone can be able to stay quite firm and stable during a flight.
Step 9: Connecting Open Pilot to the Drone
This step can be one of the most important for people who wonder ‘how to build a drone?’ The Flight Controller will have to be configured and attached to the electronic speed controllers. It also has to be connected with the remote control. The exact way of doing it can be seen through video tutorials that are abundantly available on the internet for the kind of flight controller that has been chosen in this case.
Step 10: The Drone May Be Ready for Testing
Everything has been connected and all checks have been performed. It may be the right time now to ensure that all functions work properly before the drone is ready to fly. Using the OpenPilot GCS, one can check the sensors and other components of the drone.
To ensure that everything works correctly, take the propellers off and try experimenting it with the help of remote control. A suitable location should be chosen for this test and it should be moved within a control distance. See to it that the cables and zip ties are in place and well connected so that nothing may come off during the flight. When these checks have been completed, the drone can be expected to be ready to fly.
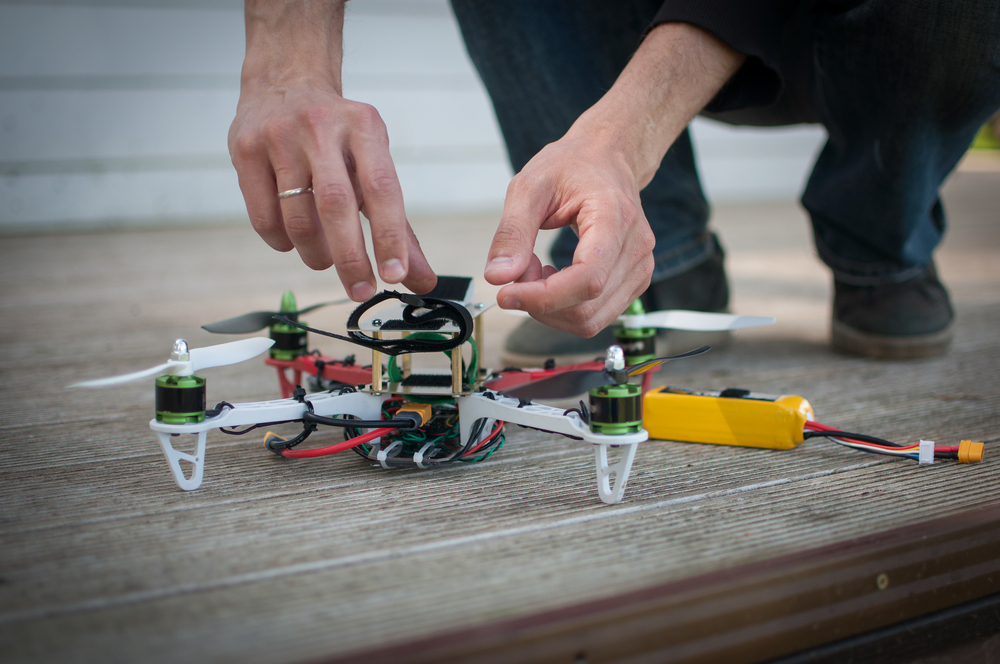
Step 11: Finally, It Is Ready to Take-off
 This is the most important step of the whole process. Before its first flight, all components must be connected properly along with the battery. For a dummy flight, a sufficiently open location should be selected so that there is no chance of any mishap occurring.
Place the drone on the surface, start it up, get the flight controller and enjoy the first flight with slow, brisk movements at first. The flight should be kept at lower heights so that any typical issue can be identified for resolution.
By chance if it comes down accidentally, there may not be any damage in this case. Also, the trims can be used for correcting if it starts drifting in any particular direction during the flight. Various PID values can also be worked out with the drone so that its exact nature can be found out.
A Final Word on the Drone
Making a DIY drone is not so tough as made out to be. All the components may have to be assembled perfectly as mentioned and one can easily expect to build a drone from scratch. However, there are a few associated steps too in this whole process. These “intermediate steps” may also need to be mastered for making a working drone.
After making it, one can easily enjoy the pleasures of a drone. Although these may not be as glossy or professional in design as a ready-to-use drone that is available in the market. The ones that are readily available are made with much skill and many types of machines are used for making them. Therefore, a UAV built with the help of a drone kit may not be comparable to a professional company’s drone.
Both in looks as well as in features, they can differ massively. This is understandable due to the reasons mentioned above. However, people who make DIY drones just do it for self-pleasure and nothing else apart from it. It can be quite satisfying for a person to make his own drone and fly it as per wish.
Here, the cost of the project should also be kept in mind. Depending upon the type of components that are being used, the cost will also vary significantly. For making a normal drone, a person may have to shell out anything between $200 to $300 and that can be quite pleasurable for people who may have interest in it.
Apart from the stated amount, the cost of camera should also be considered so that if there is a plan of taking snaps and videos, that can also be realized.
Going through the internet and some shopping sites, one may be able to find out that one can get a sophisticated drone with camera within this budget! However, the kind of satisfaction of making one’s own drone can be incomparable to any other feeling. Therefore, people try to make drones by themselves.
Frequently Asked Questions
- Is it difficult to fly a drone?
It all depends on the individual and the drone that is being flown. Some high end models of drones can be very easy to fly with only basic knowledge whereas there are cheaper variants too that can be quite tough even for a seasoned pilot. Therefore, it can depend from person to person and from drone to drone.
- Which is the best place to fly a drone?
Actually, there is no such place called ‘the best place’ for flying a drone. However, before flying a drone, it should be ensured that there is as less people as possible in the selected place so that no one may get disturbed unnecessarily.
Moreover, FAA has mandated that a drone must make its flight within 400 feet only. Also, privacy concern of individuals should be respected and drones should not be flown near to any crowded place, event or people’s gathering. It is due to the fact that if by chance, there is a mishap of the drone, that can be fatal.
Hence, drone should be flown at a less crowded, secluded place.
- What can happen if a drone flows out of the range of transmitter?
There are many drones available in the market that sport this feature wherein if it travels accidentally out of the transmitter’s signal, it can either return back to the controller or may make an automatic landing. Getting such a drone can be quite satisfactory which comes back on its own.